Tuesday, December 11, 2012

Makeup Tutorial - Eyebrows

Hi dolls,
I decided to do a quick makeup tutorial via pictures on how to fill in your eyebrows. I must say this is a question I get asked often. To be honest, I'm always changing it up with different products, brushes and techniques. I do this because either I find better products or I just get bored of the results. My current eyebrow routine involves filling in my brows with eyeshadow, pigmented eyebrow wax, and lining it with an eyebrow pencil. Here and there i'll enhance it with concealer by placing it below the brow and sometimes above. This gives it a more defined and sharper look. I'm sure you guys have heard the phrase "Eyebrows are the frame of the face" in which I believe is entirely true! I suggest everyone focus on their brows whether it involves filling them in or not. Just remember that the goal to filling in your eyebrows is to make them look as natural as possible! No one likes "chola" eyebrows right?! ;)

My current favorites are:

Benefit BrowZing in Medium

Sonia Kashuk Concealer Brush                 

Sonia Kashuk Eyebrow Pencil in Taupe

MAC Brush #208                                      
MAC Select Cover-Up in NW 20

     Tutorial:
Step 1: Brush eyebrows in place using a spoolie.
Step 2: Line your eyebrows using an eyebrow pencil of your choice. Make sure the pencil is sharpened.
Step 3: Using MAC's #208 brush (or any angled brush) fill in your eyebrows with an eyeshadow color. I recommend staying away from black and shimmery colors. They tend to look fake. Also, remember to be light-handed!
 Step 4: Fill in your brows using eyebrow wax. This will help any stubborn hairs stay in place.
Step 5: Dip a concealer brush onto a cream or liquid concealer and line below the brow. 
Step 6: Blend the concealer in downwards strokes. Set it with a translucent powder or any light eyeshadow color of your choice to highlight the brow.  
(Steps 4, 5 & 6 are completely optional)

Voila!
Please let me know if this was enough information or not. I appreciate all your feedback, and love to help! 

xoxo
Maggie

Thursday, November 29, 2012

Makeup Tips: DIY Eyeliner

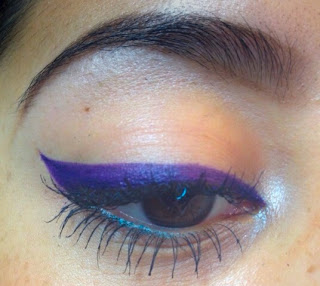
I'm really excited about sharing this little cool trick with you girls! After Pinterest I noticed that a lot of people are really into the whole "DIY" (Do It Yourself) madness! So I asked myself, "Why not blog about something that is totally related to that!?" I then remembered about this cool trick that I learned back in beauty school about how to turn powder eyeshadows into liquid liners! It's pretty awesome because you can use ANY color eyeshadow. Instead of using common colors like black, brown, and even blue you can use something crazy like pink, purple, orange, etc! It might be a little too crazy for you guys, but honestly I don't see anything wrong with going to the grocery store with neon pink eyeliner! ;) 

So, here are the steps on how turn eyeshadow into liquid eyeliner:
You will need: 
*Some sort of spatula (or something to scrape off the eyeshadow) 
*Palette (or a something with a flat surface where you can mix the ingredients) 
*Water (I use MAC's Fix+ spray)
*Eyeshadow (your color choice)
*Eyeliner brush (your choice)
Step 1: Scrape off about a quarter-sized amount of eyeshadow.

Step 2: Carefully and slowly spray MAC's Fix+ (or water) onto palette. You'll need about a dime-sized amount. Don't spray or add directly to the scraped eyeshadow.

Step 3: Mix the eyeshadow and liquid until smooth. Make sure it doesn't get too watery.  If it does you can always add more eyeshadow. It should look like the consistency shown in the picture below.
 Step 4: Using an eyeliner brush, dip the brush into the product and apply to eyelid. It will apply wet, but will dry in seconds.


Here is another color I mixed. Pink!


Monday, November 12, 2012

Makeup Tips: How to Clean Your Brushes

Hello gorgeous!!


So, I wanted to bring up a subject that I think is extremely important especially as a makeup artist. MAKEUP BRUSH SANITATION!  Many of you know that you should clean your makeup brushes, but choose to ignore it anyway. Every time I ask people why they don't clean their makeup brushes they say things like, "Im lazy" or "I didn't even know about the importance of it". Well, let me just tell you that if I go a week without cleaning my makeup brushes I tend to break out! :( The reason this happens is because brushes tend to accumulate bacteria that is found in the air, makeup, and even on your own face (especially if you have pimples).  That's why it's also very important not to share your brushes with other people for the same reasons. I know it can be a hassle to clean your brushes, but just think of it as a hygienic routine!

Two ways to clean your brushes:
The Fast Way (daily) which involves using fast-drying, brush cleansing sprays that sanitize, and remove some of the product from the bristles.
The Deep-Cleansing Way (weekly) thoroughly cleans and sanitizes the brush with soap or shampoo, but needs to be air dried which can be done overnight. 

How to:

The Fast Way: 
Using a daily brush cleaning spray, spray the tip of the brush (about 2-4 sprays). Once the tip of the brush is covered with the cleanser, swipe the tip of the brush back and forth against a towel. Lay brush on a flat surface, and let air dry for a couple of minutes. 
And that's it! ;)

The Deep-Cleansing Way:
 (Note: The Daily Makeup Brush Cleaner shown in the picture below is used for The Fast Way routine)     

Pour about a quarter-sized amount of shampoo and conditioner. 
Note: Conditioner is optional, but I find it important, because it helps the brush last longer due the nutrients it provides. Plus, its makes the bristles softer! 

Add warm water about a little less than half-ways.

Add brushes and let soak for about 10 to 20 minutes.

Rinse the tip of the brush in warm water while gently squeezing out the excess product from the bristles. 

Squeeze out excess water, and swipe the brush in a back-and-forth motion on a towel. This helps absorb some of the water.

Lay brush on a flat surface, and let dry overnight. They'll be nice and clean in the morning! :D
                                                                

Monday, November 5, 2012

BB Cream Phase (Review)

Hi girls! (and possibly guys)  :)

So, lately i've been on the hunt for the "perfect" BB Cream. If you don't know what BB Cream is well let me tell you!

"BB" actually stands for Beauty Balm (or Blemish Balm). 
It's an all-in-one product containing serum, moisturizer, primer, foundation, and sunblock. Doesn't that sound amazingly convenient!? :D

I love the fact that it contains primer, because it helps seal fine lines and my large pores WITHOUT clogging them! It can be worn alone or under makeup as in foundation and/or powder. They do come tinted, but only provides sheer coverage which is why I wear actual foundation over it when I need that full coverage. Also, i'm very impressed with is the fact that they come with serums containing vitamins, nutrients and all that good stuff that our faces need. They can treat blemishes such as acne, sun spots and age spots. They may also contain anti-wrinkle, anti-inflammatory and soothing effects. AMAZING RIGHT!? :D 


I obviously haven't tried every single BB Cream that exists, but here are 4 that I have tried:

Dior - Hydralife BB Creme 
It's more liquid-based rather than creamy, but amazing! Covers my pores and fine lines.


 Loreal Paris- Magic Skin Beautifier
Affordable, and covers my pores the best! This one is actually my favorite of the moment!  It goes on white, but oxidizes to your skin color. It's my go-to BB cream!


Smashbox- Camera Ready
For being Smashbox, i'm honestly not THAT impressed :( It doesn't cover my pores which is a huge fail in my book, but on the bright side it does give me great coverage.


Maybelline- Dream Fresh
Great coverage, but seems like an ordinary tinted moisturizer to me. There's really nothing special about it to me. It didn't cover my pores or fine lines :(


Here are some swatches, which are obviously not blended in. 
(From top to bottom)
Smashbox, Maybelline, Loreal, Dior

Have YOU guys tried any BB creams? What are your thoughts?


Wednesday, October 17, 2012

Think Pink! (Review)

Pink Lip Colors (Review)

So, I wanted to write about my top 4 pink lip colors. Pink isn't only feminine, but it's fun and flirty! I actually have a HUGE collection of pink lipsticks, but I thought it would be nice to give a quick review on my current favorites along with my ALL TIME FAVORITE!

                                                 Yves Saint Laurent - Rouge Volupte in #27
                                                
Creamy (perhaps a bit too creamy). To the point it smears easily. Smells amazing!!! As in fruity! Highly pigmented. In between coral and hot pink. Approx. $34 :(

MAC - Impassioned  
                                               
Hot pink! Pop-of-color type of lipstick! A bit creamy, and matte. $15

                                                     Makeup Forever - Aqua Creme in #7
                     
Hot pink with gold shimmer. HIGHLY PIGMENTED & LONG LASTING! BUT!!! Make sure to add lip balm before applying, & maybe a bit of gloss afterwards since it is VERY drying. Can be used on cheeks as well. Approx. $23  

 OCC - Lip Tar in Anime (All time favorite!)
                                                
Not only is OCC infamous for their Lip Tars, but they are 100% Vegan & Cruelty-Free! Yay animals!
This lip tar color is my FAVORITE! Like ever! It is long lasting, smear-proof, & you only need the tiniest drop. It's highly pigmented, neon & dries matte. Add gloss for shine. Approx. $13 - $16


                                                          Swatches (from top to bottom):
                YSL Rouge Volupte #27, MAC Impassioned, OCC Lip Tar Anime, MUFE Aqua Creme #7  

Saturday, October 13, 2012

Camera Ready Cosmetics Haul

Hi everyone! So, i went on an online hunt for Ben Nye's Banana Powder used on Kim Kardashian for her infamous highlight look! I also came across these other awesome products, and thought i should give them a try! And OMG! I am in looovvve! Best purchase ever!!! Here's what i bought:

Japonesque Precision Eyelash Curler: For those tough hard to reach lashes!

Beauty Blender: Best. Sponge. Ever! This seriously applies your foundation ever so flawlessly! (If that's even a word!)

Kryolan's Dermacolor- Matte lip colors with a hint of shimmer.

Ben Nye's Luxury Powder - In Banana (for the Kim K look), and Cameo for lighter skin tones.

Mehron Cheek Powder Pallete- Multiple blush colors for almost every skin tone.

All these products can be found on camerareadycosmetics.com

Past Halloween Looks

Hi loves! Here are a couple Halloween looks that i've done in the past. Well, they might not have been specifically for Halloween, but they definitely work! ;)


Friday, October 12, 2012

Quick Bio

Makeup Artist from Hollister, CA

Attended & graduated from: 
    Academy of Cosmetic Arts (Los Gatos, CA)
    Blush School of Makeup (San Francisco, CA)

Here to share my beauty advice and random thoughts!